Tuesday 29 November 2011

More Stripping

Took photos, made notes and labelled wires for the rear loom


Removed rear seats, again first impressions are good, but appearances can be and often are deceptive!
Speaker Holes have been butchered, need tidying up; as the door cards are untouched this will probably be the only place i will put speakers. But that's a long way in the future!


Original unfaded Verona

Tidy from a distance - break out the dry ice?

This needs more cleaning to reveal what lurks below

Next challenge is to find space to store what is being removed


Monday 28 November 2011

The Plan (1st Edit!)

At this stage the plan is to re-register with the least expenditure possible. In order to re-register a vehicle in NZ it must pass a stringent examination, to pass this all repairs must be done to a high standard - no newspaper, fibreglass and bog for structural repairs! A repair certifier will be needed to check repairs before they are covered


 Brakes, suspension, steering, lighting all to be renovated to a high standard. However as i understand it if the engine is tired, gearbox whiny, seats ripped and trim rough its not a concern - as long as the car is safe.


So 1st stage is to make it legal and functional  - a daily driver/beater. And the way things are progressing that is challenge enough! 


I plan to be doing all my own bodywork at this stage, on previous projects i have used a mixture of oxy-acetylene and arc welding, however i plan on buying a MIG welder shortly (Lincoln180C), to protect bare metal i plan to use 2 pack epoxy primer, possibly brushed on, and leave existing paint on where it's sound.


Beautiful - One Day!!


Sunday 27 November 2011

More is revealed

Continued to strip the trunk area, taillights and bumper taken off.
Gotta love the roundies

For wiring reference


Born 4 days apart!


And some prior repairs become obvious - why should i be surprised, i dont think ive ever bought an old car that hasn't revealed a dirty secret or two!


The wheel well is made of lots of patches

Should have seen this earlier
So holes in the 2 corners next to the wheel arches and a wheel well made of metal origami - should i bite the bullet and add a floorpan to the wish list? 


Saturday 26 November 2011

Movie Time

With the help of my son James we started her up aagain and this time drove (very slowly no brakes!) outside to run for 10 minutes checking for leaks or other problems. Also took a video


Not much else today, some more photos

Rusty door bottom

Detrius from the Trunk - only found 5c


Overspray - quality repair!!


Friday 25 November 2011

Fuel tank out

Started her up again in the morning, this time for about 3 minutes - very smoky but on inspection smoke appeared to be coming from oil on the exhaust manifold so no need to panic yet!


Front right caliper seems to be seized so wired it out of the way and left it alone - it will be getting a rebuild further down the track


Handbrake (E brake) wasnt working, easy fix this one, adjustment nuts had been loosened right off so did them up and we have a brake - Useful for moving around the yard


Time to take the plunge - out with the fuel tank, came out easily, a few bolts, a bit of pushing from below and


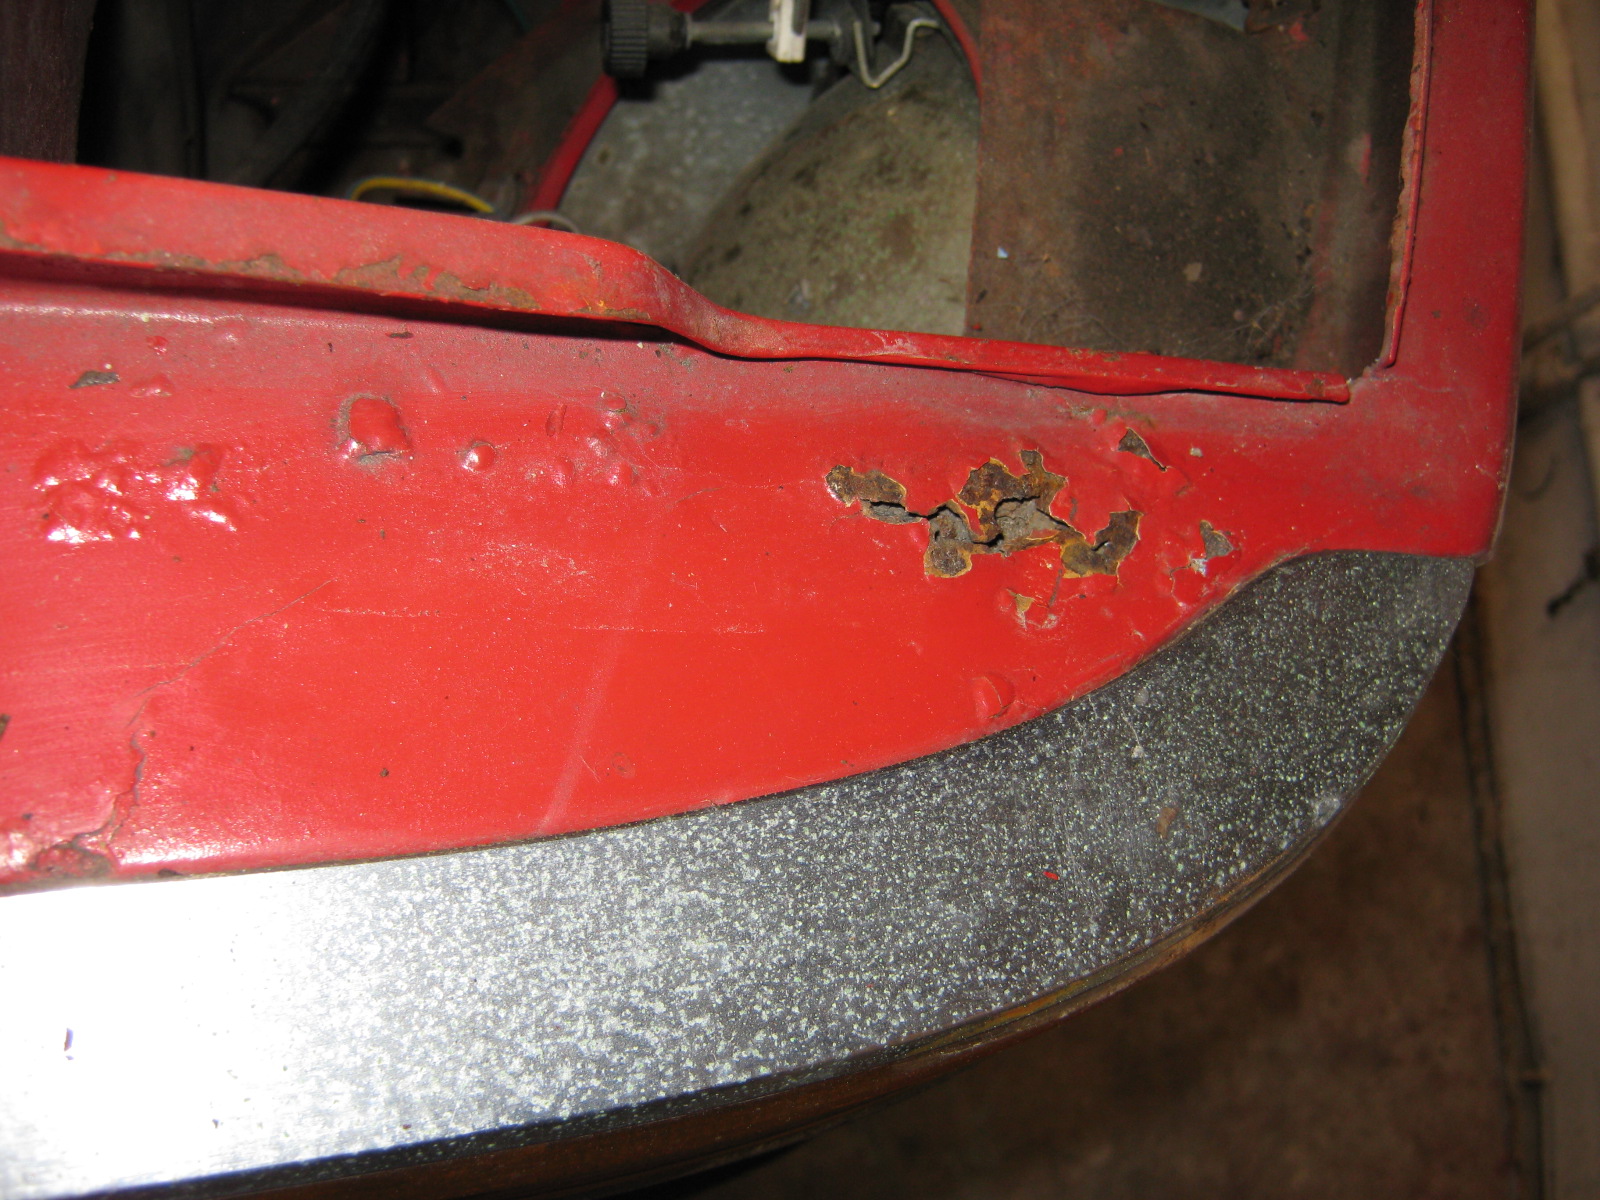
This allowed me to start digging around the rusty area in the corner to reveal - BOG, no surprises there really! And the hole kept on expanding


More digging will be needed but at the moment im quite happy with the amount of rust ive found, the rest of the trunk floor appears to be sound, the flange for the trunk seal is rust free and the petrol tank seems at first inspection to be good. Another plus is what look like origional grey side and bottom panels


More Digging Tomorrow


Thursday 24 November 2011

Its Alive!

Pulled the top off the carb to check things out, looked nice and clean inside so topped up floatbowl, and accelerator pump worked so put it back together


Plugs back in next 


2002 Plug installation Kit!

Thanks to BMW 2002 FAQ forum for the rubber hose trick to aid installation, works really well and avoids the possibility of cross threading

Ok, fingers crossed, choke out, a couple of squirts of the gas pedal and......STARTED 1st GO and on all 4 cylinders!!!! Not bad having not been started for 8 years! Ran for about 30 seconds then started to smoke - probably oil on there exhaust manifold but turned off just in case. Will have another go tomorrow also checking oil and water circulation. 

Good Engine !!


Happy with the first weeks progress although i know this is the easy stuff

Wednesday 23 November 2011

Oil and Gas

Swopped the oil filter for the correct one, about 25mm shorter and it clears the battery tray


Then its out with the old and in with the new


Jury rigged the fuel lines to a Jerry can and cranked over with the plugs out to get the oil and gas moving ( a 1900 amp jump starter helps, im glad i bought the big one!)


Gapped the plugs, the workshop manual says .6mm + .1, not sure what that means so gapped at 0.65mm, should be fine


Despite lots of fuel being pumped, nothing is squirting out of the accelerator pump nozzle when i rotate the linkage so the carbie may have to come apart, more workshop manual reading! 


Tuesday 22 November 2011

Ignition Pt3

Turns out the second lead was for the diagnostic system, its been chopped off and so will be relegated to the parts stash. Tested the LT circuit, cleaned all contacts and got a spark at the plug that jumped 6mm so that should do the trick. 


I bought a cheap oil filter just to use for the initial startup, unfortunately its about 30mm longer than the one on there and fouls on the edge of the battery carrier  - dammit! I left the plug out to drain until i source an oil filter that fits -might have to fork out on a genuine filter!! 


Quality parts???? _NOT

This ancient alarm and associated wiring will have to go as well.


Monday 21 November 2011

Ignition Pt 2

Set points gap .35mm and checked for spark across points, then held ht lead close to engine and cranked - no spark. Tomorrow its out with the multimeter and check connections.. The HT lead out of the coil has 2 leads, one went to the distributor, the other one to nowhere, this doesn't look right so will read the manual on this one!


Wheres that 2nd lead supposed to go?

Removed the battery next to allow better access to the oil filter, happy with what i found underneath, just some surface rust on the tray and none on the chassis rail 


Next off with the oil filter, i will replace and change oil before trying to start up


Not much else done today so a couple of photos to finish

Fail - not the most accessible condenser

Original air cleaner - Cool


Sunday 20 November 2011

Ignition Pt 1


More rust photos!
This looks like a challenge
More fender rust
Have decided to sort some mechanical stuff out and get it running before ripping her to pieces, i at least want to hear the motor going!. took the plugs out, disconnected fuel line to carbie, attached a jump starter and cranked her over - success - starter motor works - tomorrow the ignition


Saturday 19 November 2011

Investigation

A few more photos taken after a bit of investigation


The Good


Looks straight - no obvious accident damage, panels fit well, original and unrestored, engine bay also looks like it hasn't been messed with.


The Bad - Surprise Surprise RUST. I know that as you dig deeper more will appear but on first inspection chassis and floor look OK. A few more photos of the horror


Floor by Petrol Tank _ The Tanks coming out!
Rear Shock tower (other side looks OK)


Yuk

Cut and Polish should sort this!!

Nasty, more digging required, window seals are perished as well


Overall still very happy with the purchase, no major stripping down will happen for a few weeks, need to devise a plan of attack given limited storage space and also have my last project to finish off - Anyone want to buy a 1/2 painted KE70 Corolla?